Translate This Page
Updated 09/01/2022
We no longer undertake any Solar Installation work.
but we do have some Solar Power Installation hints and tips, after all Solar power is all about battery charging and that is something we do know a bit about.
Ian Stracey wrote back in 2018:
"I would like to thank you for all your advice regarding solar panels, batteries and Schaudt Solar Panel controllers.
If you are installing Solar Power to a Motorhome or Touring Caravan that is equipped with a Schaudt habitation PDU we would always recommend using a Schaudt Solar Controller and to not exceed the maximum solar harvest input current. Schaudt currently manufacture two solar controllers, the basic LM1218 and the advance MPP (maximum power point) controller the LRM1218. The LRM1218 is also SDTBUS compatible. Both controllers come with the appropriate premade cables. See PDF specification and operating instructions at the foot of these pages.
Votronic manufacture a range of Dual Battery MPPT Solar Regulators which are well priced but you will have to specify which cables you require to complete the installation. If it's for a Schaudt equipped vehicle, like a Hymer, then ask for the Schaudt compatible cables Votronic part number #2007.
The Votronic 250 also has an AES Fridge 'trigger' that can switch a Fridge from Gas to 12v when the Solar supply is high enough. Note that to power a conventional AES (Automatic Energy Selection) fridge on 12v the Solar Panel must be capable of supplying at least 13.5v and about 14amps. That is the minimum power that a typical 12v Fridge element requires to operate. Any less and it will just take the excess from the Habitation area battery which will discharge the battery.
We are not fans of the Victron ranges of Solar Regulators as they are NOT designed for a motorhome or touring caravan.
If they were they would have Starter battery charging capability. They are better than some but not in the same league as the Schaudt or Votronic, especially the lower range which are just badged Eastern copies and very poor by comparison.
See this very poor performing example
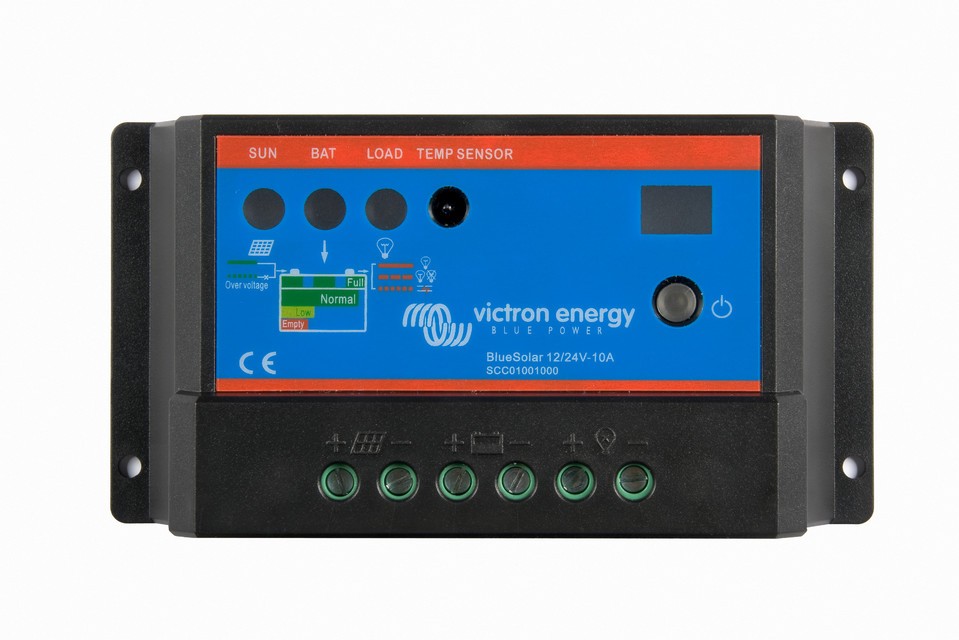
Please don't rely upon the Solar panel supplier to give good advice, many lack experience about Motorhome Power controller/charger installations. Almost all will tell you to wire it through to the habitation battery with separate cabling going to the Starter battery. Not only is that a lot more time consuming but expensive, more complex and less efficient/reliable.
Follow the way the motorhome manufacturer or PDU supplier recommends it to be done. Anything else might invalidate warranty and reduce functionality.
Solar Electrical Installation Suggestions.
1. It is standard Electrical Industry practice to install a Fuse in any 12v power cable at the battery 'power' end. This is to protect the devices and the cable. A Solar array can be a big power Source, if the cables are shorted there will be amps across them. A Solar Array is a power source in the same way that a battery is. It is lower current but will still melt wires and Solar Regulators.
Therefore please install fuses into the cables as soon they come in through the roof. We rarely see a professionally fitted Solar Install that builds in this electrical safety.
There is always a fuse on the battery side of the Regulator, but rarely one on the Solar Panel side of the Regulator when there should be both.
Fit a Fuse between the Solar Panel and the regulator that is ideally bigger than the 'normal' Solar Panel current but lower than it's Short Circuit current, not just to to allow some electrical protection, but also to allow you to isolate the Solar Panel from the regulator during maintenance work. Like changing the batteries.
Failure to isolate the regulator from the Solar panel during battery maintenance can lead to solar regulator failure or damage to electrical items inside the vehicle. Consider putting a label inside the battery box on the leads to remind engineers/you to pull the Solar Panel fuse first with information on where it can be found.
Click here for a page to print off to put in the Battery box or for suggestions on the text.
2. Install the regulator as close to the PDU or Battery as possible. The Solar panel can have voltages higher than 25 volts when it's working effectively, output from the regulator can be less than 13 volts on a Cloudy day. Therefore in an ideal world you want the longest part of the cable run to be at the highest voltage to keep voltage drop to a minimum.
The 13v cable section from Solar Regulator to Elektroblock should be the shorter run.
Put another way, if you lose 1.5v from 25V on the way to the Solar Regulator, 23.5v will still arrive for conversion down to 14.4v to charge the battery. But if you lose 1.5v on a long cable run after it has already been 'regulated down' to 14v, your battery is going to get only 12.5v and little or no charge.
These are not realistic examples but just there to illustrate the point. The actual voltage drop is low, but when we are talking about fractions of volts/amps in Winter, every tiny bit of power counts.
Many of the better Solar regulators specifically state it should be mounted within 30cm of the Battery/PDU.
This often puts the regulator in a position under a bed, under the Drivers seat, in outside locker, etc which means it won't ever be seen so the Motorhome specific regulators never have a built in screen, for obvious reasons.
If it has a built in display that you will rarely be able to clearly read, then it is obviously not designed for a Motorhome but for House Roof Solar or battery backup in lighting systems. This is especially true if the controller has a "Load" output.
Inadequate thought at the wiring installation phase can have a significant effect on the charge rate in low light conditions when every milliamp counts.
If you have a Solar installation and the Solar Regulator is located up near the roof a long way from the batteries, the Installer did not understand basic Electricity. Get the vehicle checked as in our experience there will be more things awry. Like Fire Safety Fuses not fitted, Battery Masters installed, etc.
If you want a remote display that tells you the exact power harvested, Volts, Amps and total Amphours over the whole day, try ebay for a 'Wattmeter' like this one, they can be found for as little £8 :
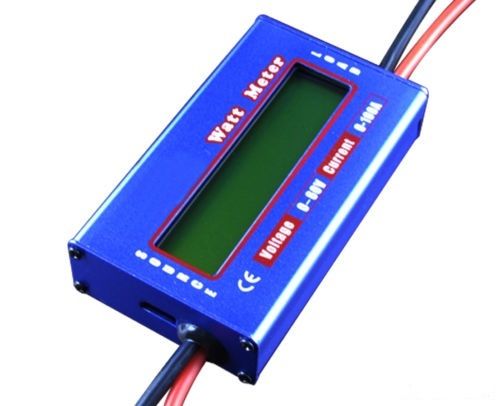
It doesn't just tell you amps and volts like some of the others, but also displays the total number of Amp hours input each day into the battery.
It is very easy to wire in, some of the other models are more complex and require extra components. You can install it between the Solar Regulator (Source) and the PDU (Load).
However, installed in this way it will draw about 8mA all the time to power the LCD display, even when the Sun goes down.
If you wire it between the Solar Panel (Source) and the Solar Regulator (Load) it will use the power from the Solar panel to drive the LCD display, but obviously once the Solar Panel stops producing harvest there will be no power to drive the display so it will shutdown until the Sun returns.
This is how we recommend you wire it as it's more efficient and means you can site it away from the PDU which is usually in an inaccessible place. However, each day it will 'shut down' and you will lose 'long term' information and all the counters will reset to zero.
For maximum efficiency keep the cable run short. Note while it is 'rated' at 100amps, the cabling suggests less than 50amps will overload it. Suggest you regard 30A as it's permanent maximum limit.
These meters are accurate and will tell you what power has been put into the Batteries over the entire Solar Day, the total Amphours put in, plus the usual Volts and Amps. Great for diagnostics as well and tracking how fast the Solar panel is deteriorating.
It doesn't need to be this exact unit, just something similar, but these are very easy to wire up.
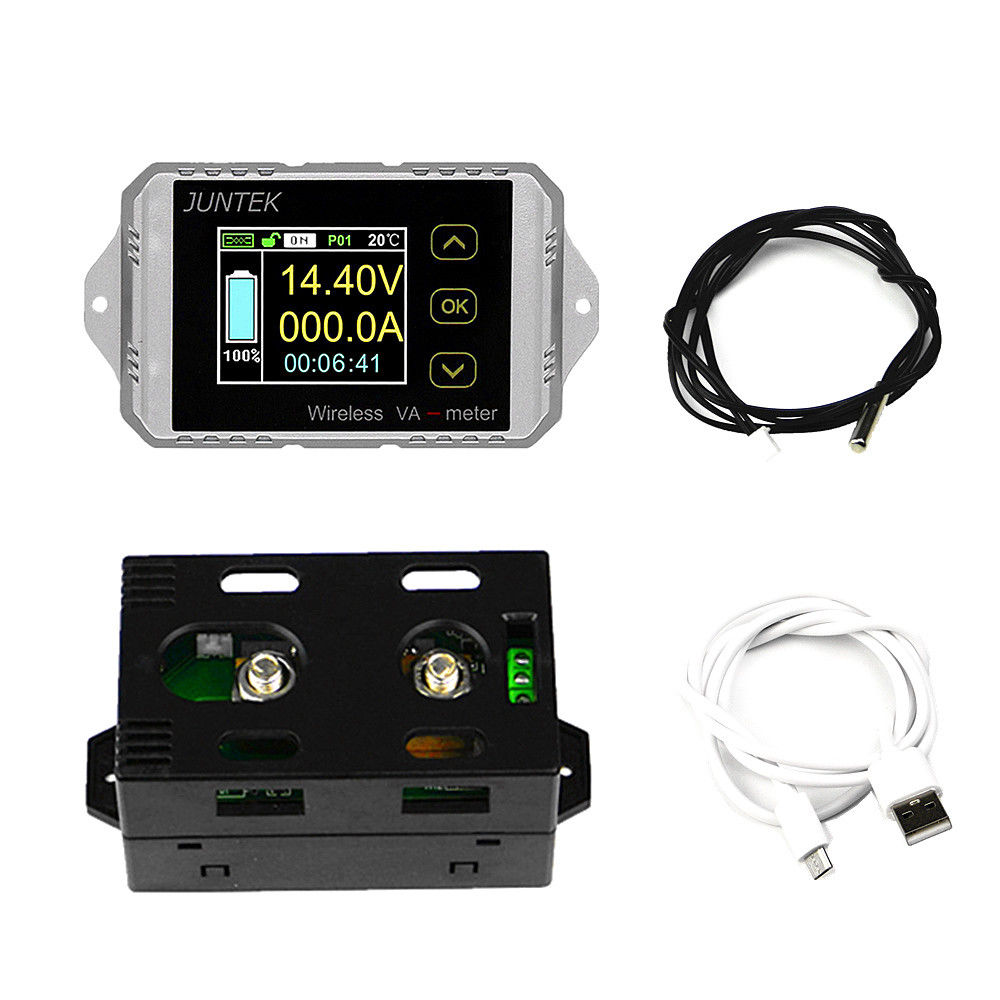
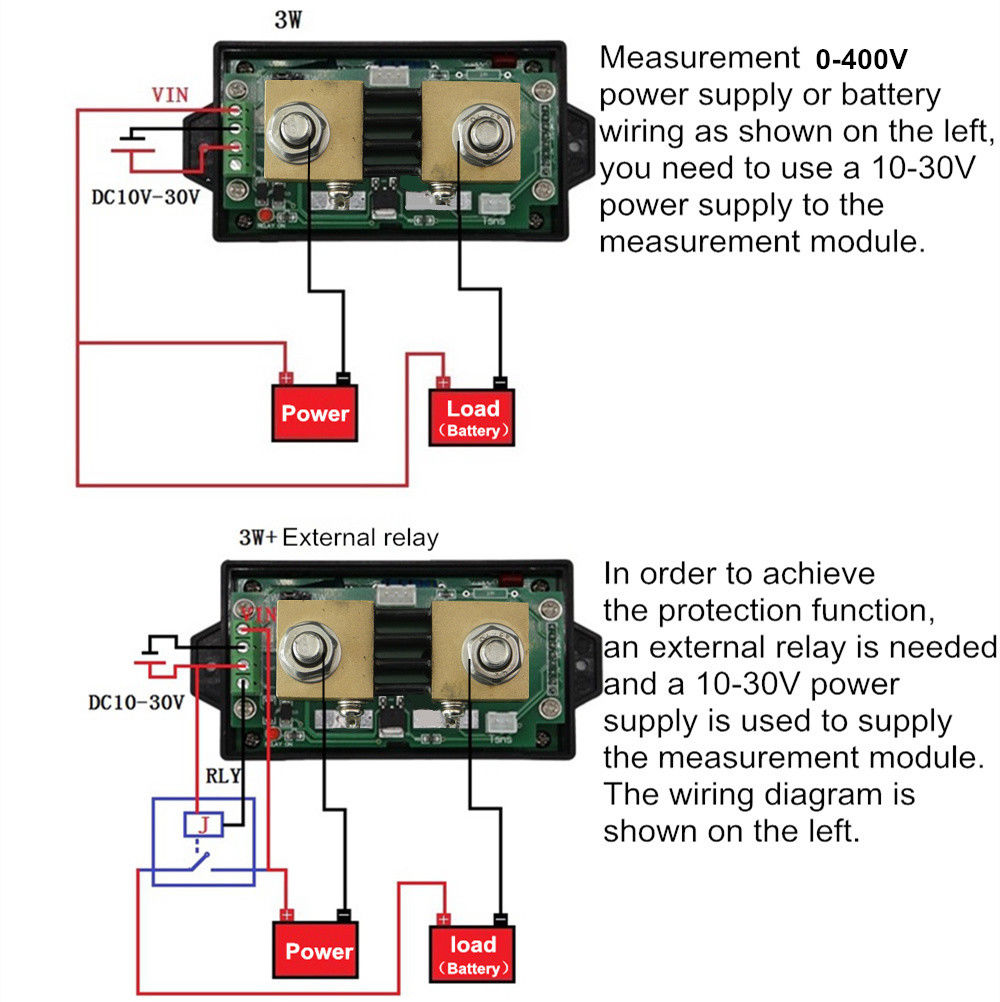
Something more sophisticated with even more functionality is this Colour Wireless display :
It shows battery capacity and watts, amps, etc. but we have never installed one.
3. We suggest you plan on including both Engine Starter and Habitation Battery in the Solar charge installation. Modern Motorhome specific Alarms use less current than they used to but can still drain a Starter battery in weeks.
In storage a good Habitation battery won't need much charge, but the Starter battery might because of the permanently active ECU/Alarm, etc. So the Starter battery can help draw any excess Solar Charge away from the habitation batteries reducing the risk of habitation battery overcharge.
Opt for a Dual battery Solar regulator that will charge both batteries at the same time. The old way of fitting a single output Solar Regulator with a "Battery Master" style device to trickle charge the Starter battery works but there are now much more efficient and better ways of doing things with more modern technology and at lower cost.
Dual output Solar regulators are now less than £60 and will charge both batteries directly, without the need for any other item, like a Battery Maintainer at an extra £50.
Therefore going for the the more efficient option will put more power into the batteries, with fewer losses, greater reliability and will also save around £50 overall.
If you really want to use a Battery Maintainer, the most efficient one, that also has the highest charge rate, is the Sterling, followed by the CBE unit.
See section 13 for a more detailed description, also read this actual 'Case History' of problems one Battery Maintainer caused, see entry for 30th January 2017 :
4. Don't put a second fuse between the Regulator and the PDU if the unit already has one. On a Schaudt Elektroblock don't forget to populate the Solar Regulator fuse slot with the correct rated fuse otherwise no charge will take place. Do this as the last task just before you put in the Solar Panel 'isolating' fuse mentioned in Step 1 otherwise the wiring will be 'live' during installation. On a Schaudt install the minute you plug in the three pin Solar Cable to the front of the EBL the cable will be live as the cable will be passing the battery voltage via the Elektroblock socket.
5. Although we say use the best regulator you can afford, it is the easiest part of the installation to change later. Therefore if the budget is tight spend the biggest part on the Solar Panel as once it's in situ it is not easy to replace. The next priority should be the wiring as once it has wound it's way through cupboards and under floors it won't be something you want to do twice.
6. Solar Panels are less efficient when hot, so a cooling gap of at least 25mm between MH and panel is recommended to allow them to stay cool. Flexible Solar Panels are usually glued directly to the roof without any cooling air space, as a result they often get hotter than ideal with a resultant drop in output and sometimes premature failure. This is one of the reasons why many Flexi Solar installation owners are disappointed with the end result.
Note that Flexible panels generally have the highest degradation as they age, typically only 50% power output at 5 years. The top of a fixed panel is usually Glass, but almost all flexi panels use a clear 'plastic'. You will have noticed how Car Plastic headlights and 'GreenHouse' Plastic 'clouds' and scratches after a few years? The disappointing output, installation issues and short life expectancy are the reasons we suggest Motorhome owners avoid Flexible panels. If you do fit them, bear in mind that they may need to come off in a few years following premature degradation?
7. It is very important that your panel is not in shade for any part of the day. Even the tiny shade of a radio aerial can drop the panel output by 25%, depending on it's construction.
When a Solar cell goes into shade it stops creating electricity and draws it from the surrounding cells, producing heat. This not only reduces output but causes a Hot Spot in the Solar panel which over time will damage the panel.
The shade of a skylight on just 5% of the panel can drop the output by 40% leading to possible Panel failure.
8. BATTERY BANK SIZING : To make the most of Solar Harvesting you may wish to consider extra batteries to store the energy but remember that you should not exceed the battery bank size of the Charger/PDU manufacturer and the Motorhome Design. Most chargers support a battery bank of 10 times the charger output, so the majority of newer Schaudt 18A chargers will support 180Ah. However, bear in mind that the charger in most Continental built Motorhome also charges the Starter battery so an allowance should be made for this.
This modern Calira 20amp unit, below, has text printed on the top cover showing its "Battery Capacity" as 70 - 200Ah, so supporting the 10 times rule :
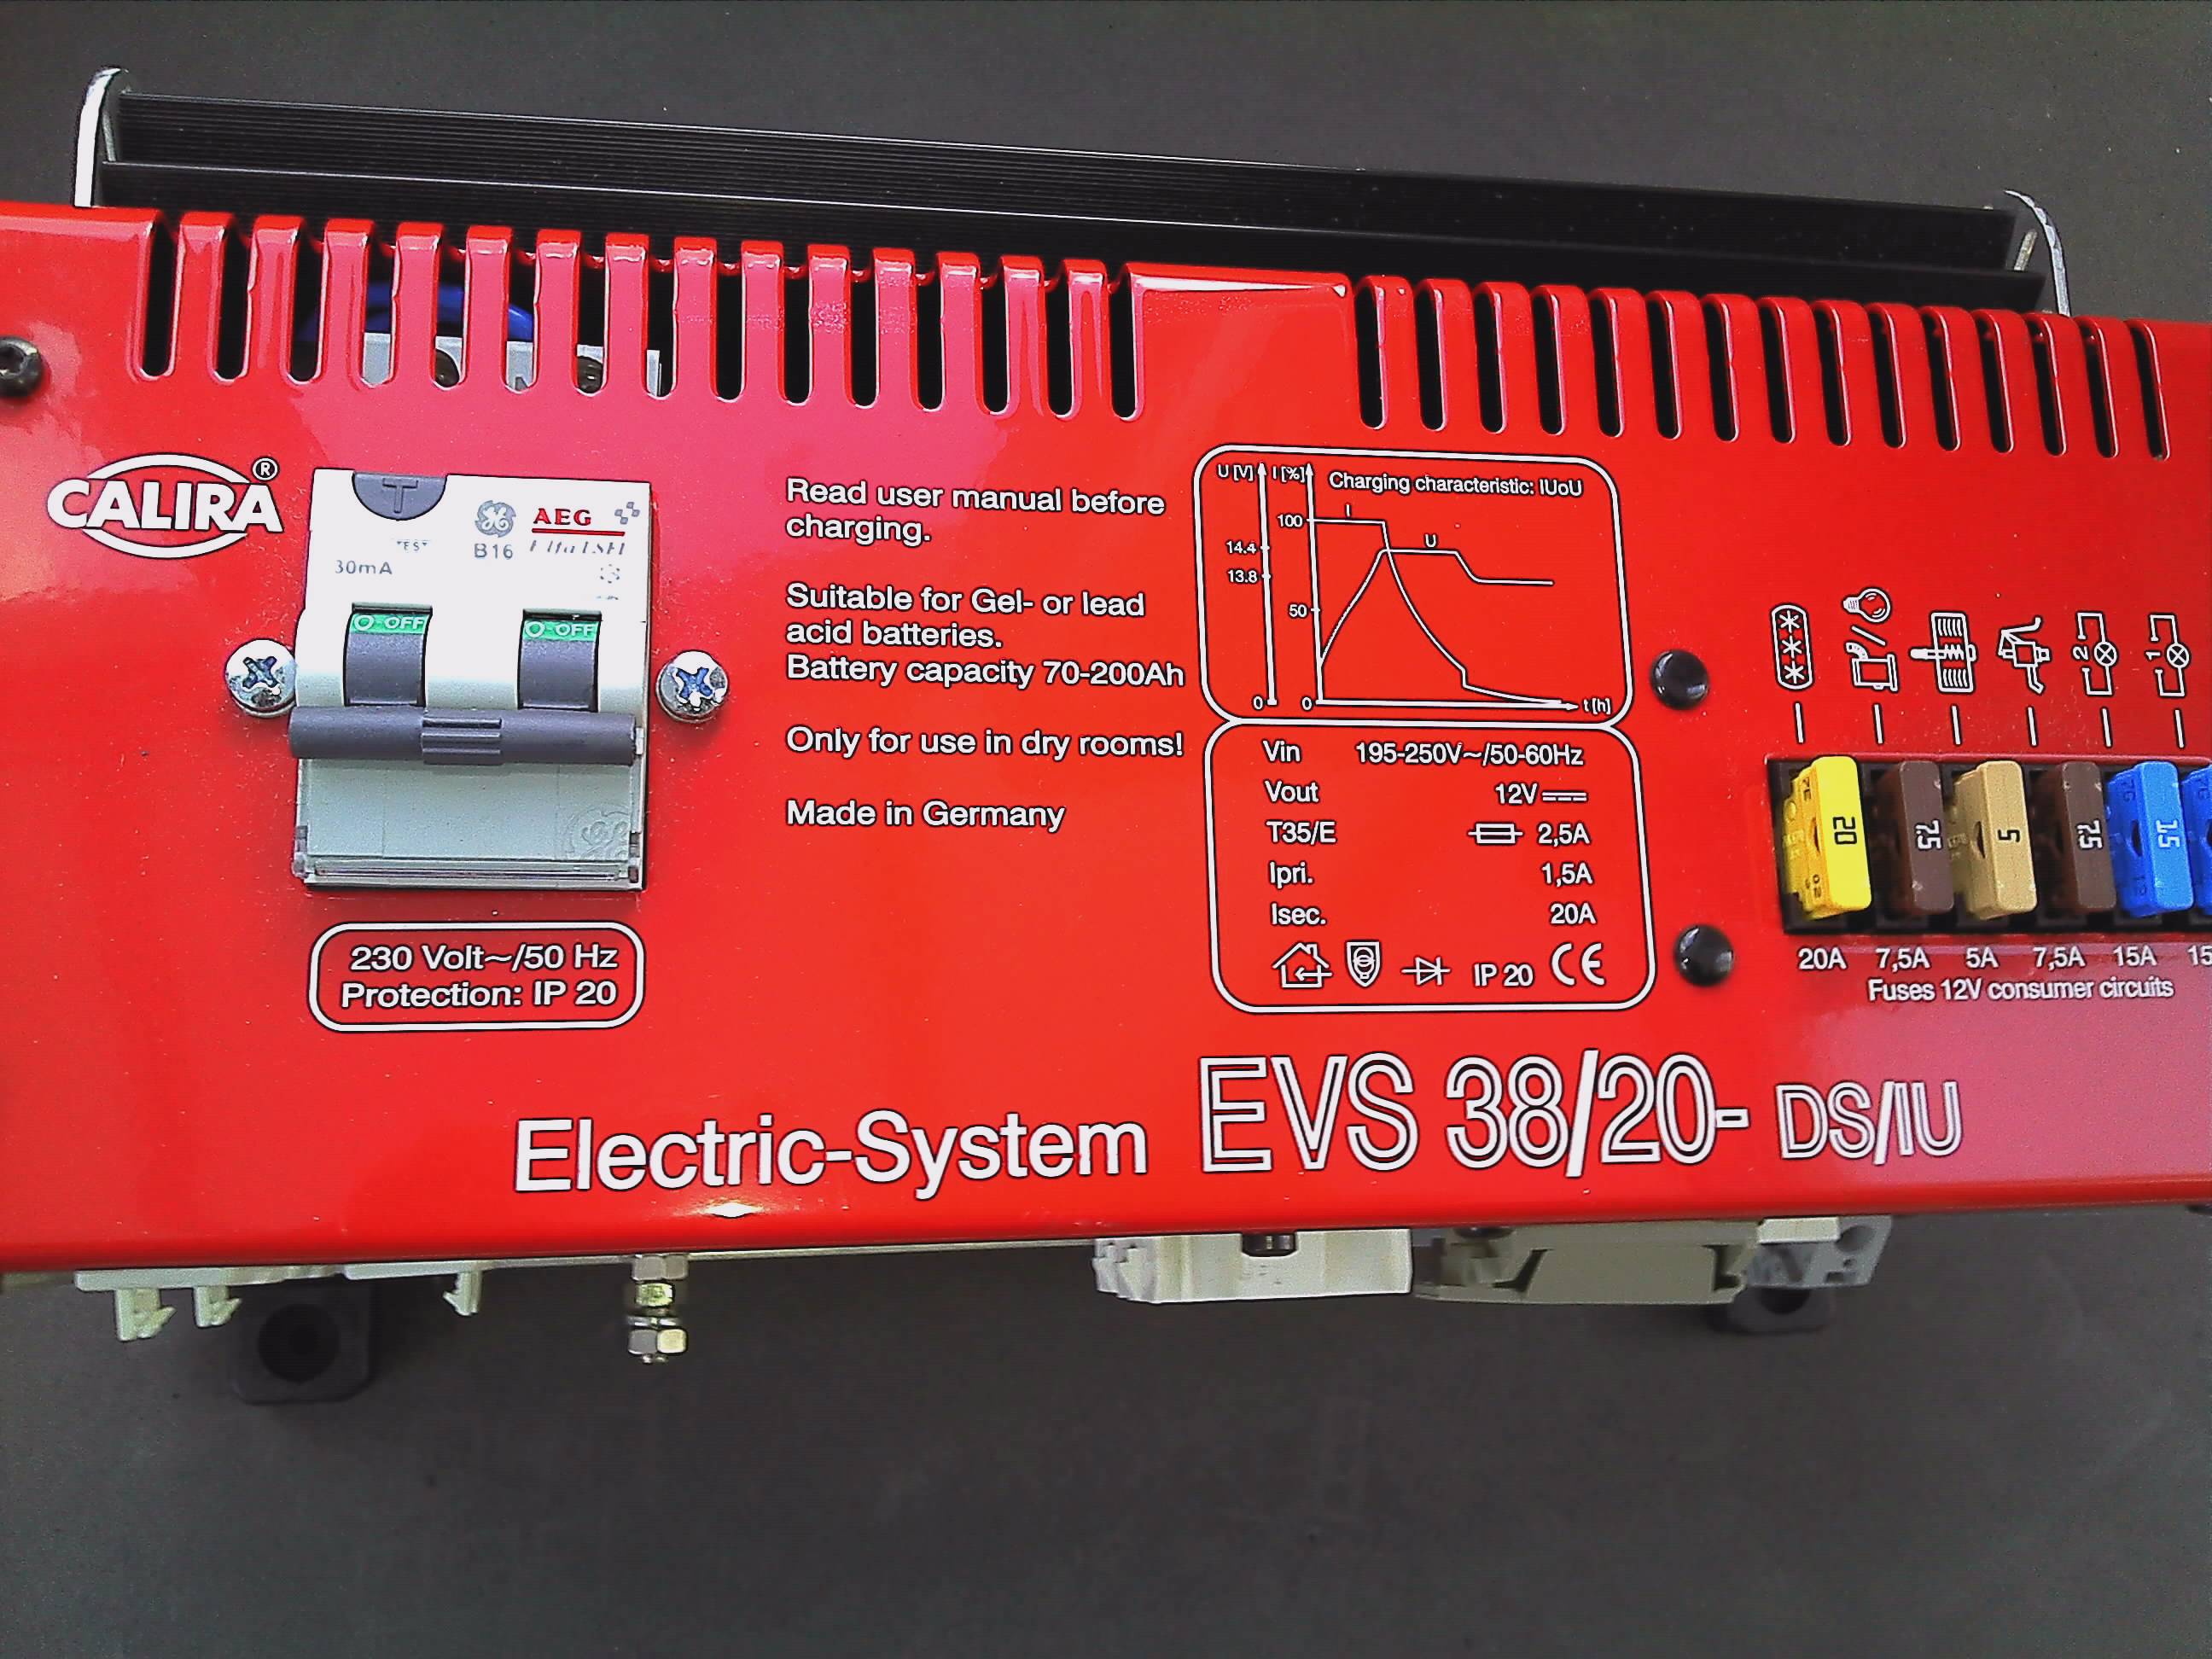
So using the Calira above as an example if it supports 200Ah and we allow 20Ah for the 100Ah Starter battery, that leaves 180Ah for the Habitation battery bank, 2 x 90Ah MAX.
Note the lack of support for AGM batteries? Just Wet Acid and Gel. Very few Motorhome and almost no Caravan chargers are optimised for AGM.
A Burstner Reich e-Box 1 only has a 16A charger (just like the early Schaudt charger/PDU) supporting a combined bank of 160Ah. If you allow 20Ah for the Starter battery that leaves just 140Ah for the habitation battery. Not surprising they fail when 2 x 110Ah habitation Batteries is common.
Consider the impact on the wiring and the Alternator. Not all Motorhomes can support additional batteries, see our webpage 'Adding a Second Battery' for examples of why some Motorhomes cannot support more than one battery.
Batteries should be the same age, technology and capacity. Mixing a 12 month old battery with a new battery or a 90Ah with a 110Ah will lead to early battery demise and long term charger failure. You are likely to end up with one battery doing all the work and the 'real' battery bank capacity being much less than you expect. See our Battery Charging Faults page for more info on the implications of larger battery banks than designed.
9. When wiring a Solar Panel, work from the Motorhome charger/PDU back towards the panel fitting the Elektroblock/Power Unit Solar fuse and then the Solar Panel fuse, as noted in Step 1, last of all. This ensures that the wiring isn't 'live' until its all connected.
10. Use a quality Solar Regulator designed for a Motorhome. We advise a switch to quality Wet/flooded acid batteries. See our Battery Technology page as to why.
Many budget Solar Regulators are only designed to charge a single battery bank so charging of multiple banks such as Habitation and Starter requires additional components reducing reliability so adding complexity and cost.
The very best Solar regulators will use Maximum Power Point Tracking, MPPT, technology which can produce 20% - 30% more charge than an apologue Solar regulator in low light conditions. An MPPT regulator can harvest as much power from a 100watt Solar Panel as a standard regulator can from a 120watt panel in typical UK poor light conditions.
11. Please think carefully about your batteries. What is the point in spending a lot of money on a Solar System and then using a battery that takes 140Ah to give you a usable 100Ah? By having a less efficient Battery you could be wasting 30% of the Solar Power.
Batteries are no longer all the same, there can be huge differences in efficiency between the best and the worst at the same price. Even a new 100Ah battery of the highest quality will need about 110Ah to get fully charged. The least efficient batteries, sometimes old style Traction/Leisure batteries can take 130Ah to give a usable 100Ah. One of these Traction/Leisure Batteries at 3 years old can absorb 140Ah but give back only 100Ah, such can be the conversion losses.
That can be 40% 'lost charging' from a Solar panel, effectively a 'real' 60 watt panel not the 100 watt you thought you had.
It doesn't take a genius to work out that if a battery is more efficient it will require less energy to recharge. When so many people are fitting Solar Panels with only a few amps output, Battery efficiency has a big impact on the power available. It is important not just because it charges in half the time but because the strain on the charger is literally cut by half whether that be the Alternator or 230v charger.
Also consider the implication for that Honda Eu10i Generator, with decent batteries, it might run for half the time using half as much fuel. Add on a second mains charger and a low power generator can bring two quality batteries back up to near full capacity in a couple of hours.
12. We don't advise a battery is left on long term EHU/Solar charge. Some of the battery manufacturers are becoming aware of this user trend and starting to advise against it. There is evidence that while a float maintenance charge of 13.8v given out by most chargers is ok for short term Float charging, there is growing data to suggest that it is too high for long term maintenance.
Roadpro were amongst the first to ridicule what we said about this 5 years ago, but their latest 'Battery' document states -
"Charging a battery from a solar panel :
Keeping a battery charged up using a solar panel sounds like a great idea but can actually do more harm than good by overcharging the battery. Some batteries are more susceptible to overcharging than others but even good quality batteries can be damaged if they weren’t designed to be on constant charge".
Full document near the bottom of the page.
Yuasa are the latest to advise against the trend. The website now contains a warning that their batteries WILL suffer, potentially reducing it's life to just 2 years. See : Long term EHU? - Yes or No.
The new Schaudt LRM1218 Solar Regulator has a reduced Float/Maintenance charge dropped down to just 13.4v, obviously supporting this concern that 13.8v is higher than ideal. Some of the Votronic Solar range use an even lower 13.3v.
New Victron Energy mains chargers now have an additional 'Storage' mode where it charges at just 13.2 for long term 'Trickle', 'Float' or 'Maintenance' or whatever term you know it as.
Almost all battery manufacturers specify a long term Float/Maintenance charge of 13.1v to avoid overcharge and fluid loss, such as those in Battery backed Data Centre, Hospitals, etc.
.
We suggest that you only buy a Solar Regulator that has a maintenance/Float/trickle charge of 13.2 - 13.4v in line with this lower suggested limit or find some way of switching off the Solar panel when the battery does not need charging?
Some B2B's, like the Stirling units, use a voltage sensing circuit to operate, not a signal the usual Alternator trigger used by most Motorhome standard charging systems. The Sterling style units monitor the voltage at the Starter battery and if it goes above 13.2v the B2B assumes the Starter battery is now being charged by the Alternator, so the B2B swings into action.
The problem is, many Solar power solutions also charge the Starter battery often raising it above 14.0v. This can cause the B2B to start up and may start sucking life out of the Starter battery, but there is no Alternator spinning to put the power back.
Suggest you do not use a B2B that uses Voltage Sensing technology to operate, at the very least make sure it is compatible with the other electronics and charging systems?
CABLING
Please be aware when buying cable, that Automotive cable often appears to have the same measurements as general cable but the cross sectional area can include the plastic insulation, not just the Copper core. Therefore General cable with a Copper cross sectional area of 4mm may have a much higher current rating than Automotive 4.0mm cable where the real Copper cross sectional area is just 3.0mm, but the plastic takes the overall cross section up to 4.0mm.
The reason automotive cable is measured differently is because in a vehicle the size of the hole the cable has to pass through is more relevant to the vehicle manufacturers than conductor core size, and one of the reasons why Thin Wall (thin plastic Insulation) automotive cable has become more prolific. Note that Thin Wall cable usually has a much lower max voltage rating of less than 60V, due to the thinner PVC insulation.
Therefore watch out for web sites selling 4mm cable that isn't.
Roadpros' take on Solar charging a habitation battery, full document :

|
The RoadPro Guide to Lead-acid Batteries for Motorhomes v 1.1.pdf Size : 979.835 Kb Type : pdf |


So when calculating the Solar gain allow at least 30% contingency for when conditions are not ideal.
For a selection on manuals for the LR 1218, LRM 1218 and DT 220C. Use the DT220 manual to add the Solar Icon to the display, see below and also the Solar Regulator LR1218 page for more info and PIN codes.

|
Schaudt LR1218-2 latest.pdf Size : 545.646 Kb Type : pdf |

|
Schaudt LRM 1218.pdf Size : 213.483 Kb Type : pdf |

|
Schaudt DT 220 C Operating Instruct.pdf Size : 579.521 Kb Type : pdf |